How to Remove Oil Pressure Pump for Doosan DL250-3 Excavator?

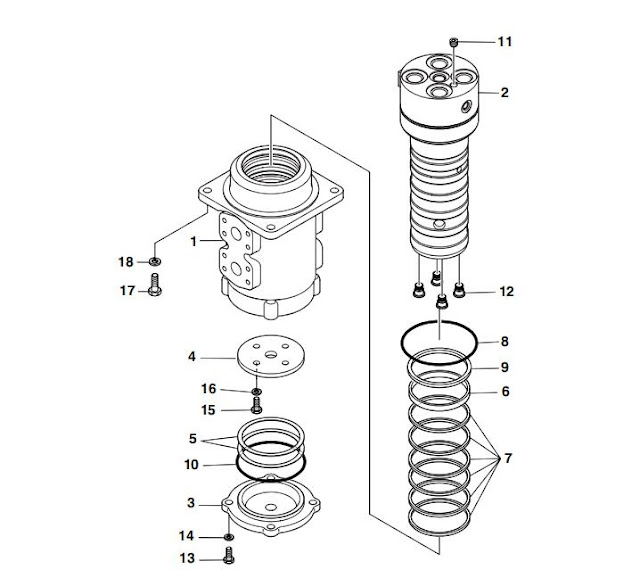
This instruction show you guide on how to remove oil pressure pump for Doosan DL250-3 excavator. Related Contents: Doosan Diagnostic Tool Doosan DMS-5 Doosan Diagnostic Software How to Remove Oil Pressure Pump 1. Remove bolts (1, Figure 35) on converter bell housing/oil feed housing and remove converter bell housing.